

Mineral identification
So you want to get your mineral identified, and it’s not one of those easy things – Either a dark, odd looking crust, or some vibrant fine crystals, or just a general “unknown” – you might not even know where it comes from! You’ve heard terms like “XRD” and “SEM” and “XRF” and “Raman” – It’s all very confusing, and figuring out where to start is challenging. If you took the leap it’s even more difficult – More often than not you contacted a professional lab, paid up the fees and got some odd looking graph with things like “theta” and “angle” written all over them, and have no idea where to start.
I’m looking at this from a South African context, i.e., what is readily available or accessible for mineral identification, and the little tricks you’re going to use, and things you’re going to ask the lab to do.
This isn’t a guide for cut stones or things like that – The little bit of sample you send is going to more than likely get crushed up, and not have much point in getting returned. Consider what you send for analysis as “sacrificial”!
In the opening line I referred to a few different techniques – Let’s blast through them, really quickly.
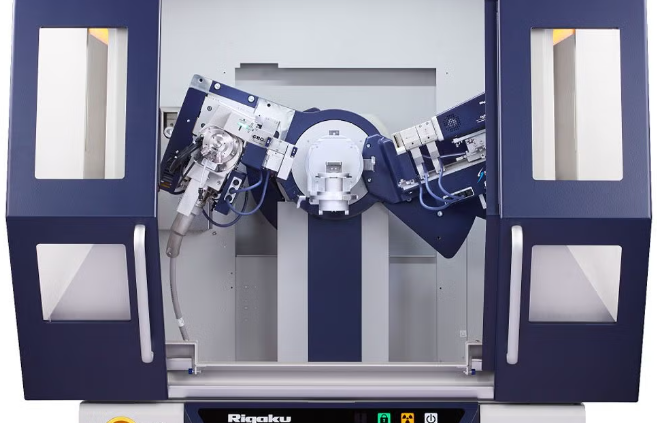
XRD, or X-Ray Diffraction, works by exposing your sample to X-rays, it’s pretty much in the title. The diffraction part comes in using the intrinsic crystalline properties of a crystalline material – in our case, a mineral specimen. Here we’re going to refer specifically to pXRD, or powder X-Ray diffraction.
So, the sample, or mineral, is crushed up to a fine powder, pretty much the consistency of baby powder, and placed in a sample holder (usually sort of smooshed flat). The holder sits between two arms – One arm holds the X-ray source, or incident beam, and the other holds the detector.
The puck containing the sample is rotated on a stage, and the arms move through pre-defined settings, with the detector gathering data continuously, starting from a low angle and moving to a high angle.
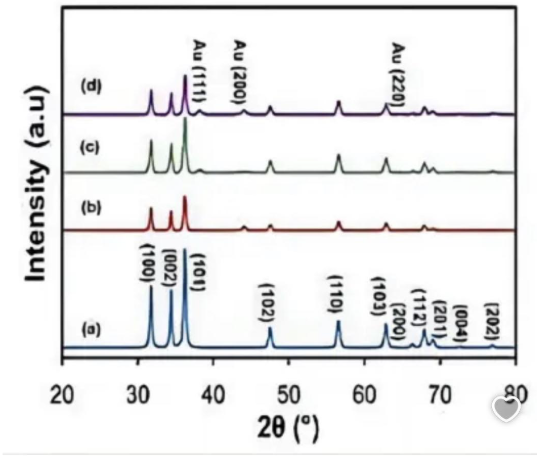
Based on the crystallographic magic and the power of physics, peaks (or high intensity, versus low intensity) data is recorded – Essentially counts, referencing the intensity of the received X-ray in the detector. This produces the graph you’ve seen before if you’ve requested this – At the bottom you’ll likely see “2-theta” and on the side “counts”, and a squiggly line running across the page.
Before you even get that far though, you’ve probably heard some variation of the following from the lab: “We’ll crush your rock!” “1g isn’t enough!” “we don’t offer that, sorry” “here’s your bill – full quant XRD and XRF! Ouch!” or “here’s your data file”, all of which don’t really help a mineral collector, or get to your goal – a mineral identification.
So, here’s some tips!
Supply the powder to the lab, not the other way around. You’ll need a minimum of three grams. What you’re going to do, is with a small scale, attempt to get as much of the mineral of interest broken off (from the back of the specimen, or an area that isn’t visible) – At least one gram, although you can get away with less. Half a gram should be the absolute minimum, however at that point results aren’t guaranteed.
Then, you’re going to find a quartz crystal, a nice, clean, pure one without inclusions and the like, and crush that up, too. Individually, you should aim for a powder as fine as talcum powder. There are reasons for this I won’t get into!
Weigh out, into a pestle and mortar, your 1g (or as much as you can muster) of the mineral of interest – Assuming you’ve made sure there is only ONE mineral present, and for the quartz, weigh out the difference to get just over 3g (accounting for loss in the next step.
Then, for around 3 minutes, grind the two powders together in the pestle and mortar. This is to get the material finer, and make sure it’s as well mixed as possible (as homogenized as you can get it in a kitchen, essentially).
This is the important part!
Now you’ve got your 3g, weighed out into a pill bottle, and you’re ready to contact a lab. You need to request, specifically, a few things.
- Are they using a cobalt tube? Don’t worry about why, if they say copper, try look for a different lab if you can
- Tell them you have, probably, two minerals present that are of interest – There may be other trace phases, but you’re only interested in the main phases, and can they please label the peaks for you
- One of the phases is quartz (don’t need to tell them more than that)
- Can they please run a longer scan, if possible, as the other phase might not have a high abundance
- You’re specifically requesting a quote for qualitative XRD only (NOT quantitative), and don’t need anything else done, just the scan, a list of the minerals present, and the labeled peaks if possible.
- If you can, tell them where it’s from. Some minerals have peak overlaps, and it may help them fit the correct mineral (I.e., I don’t expect any copper bearing minerals).
Why? Well, this is now a straightforward and easy task for the XRD technician, and processing will be very fast. It means you have more chance of them accepting your sample, you’ll get results you can use and read easily (These are the minerals present, by name!) You now have a good chance of your sample getting accepted by a university lab or similar.
In time, you can progress to other “tricks” – Leaving the quartz out, for instance. This is just to bulk up the sample with something that has extremely clear peaks, which will not likely get confused with any other mineral – Another way to do it is, when you have a relationship with the lab, say, “Hey, I’ve got 0.5g of this mineral, can you run a long scan with it sprinkled on a silicon standard? I just want to know what the mineral phase is” – Makes your life easier, too. Build the relationship first!
As a note, the baby powder thing is really, really important. Get it that fine, somehow. No gritty lumps! Work that pestle and mortar!
XRF, SEM and Raman – What are they?
These are things you really don’t need for the run-of-the-mill samples. Raman I really won’t get into, as it’s quite easy to make mistakes, and the databases aren’t extensive. As an example, for the XRD method, in the generally used databases I’ve seen most the usual suspects, as well as a wide variety of rare minerals (Kalahari and Tsumeb included), so you’re probably going to get a solid identification.
XRF, or X-Ray fluorescence, is a technique that gives you the chemistry of the sample – Something you don’t need, and preparing your powder at home will contaminate it in respect of this method anyway. The data is usually reported as major oxides, that you’ll then need to calculate down to elemental abundance, i.e., CaO to Ca. Don’t worry about this, you don’t need it.
SEM, or scanning electron microscopy, can give you a good ID, but it comes with disclaimers. For some things it’s better than XRD! For our purposes though, stick to good old powder XRD. SEM comes at a (much) higher cost, involves extensive sample preparation (usually), and if the operator isn’t sure what the phase is you’ll probably only get a list of elements present in the sample for the fee you paid.
In short, follow this guide, stick to pXRD and you should be able to get your mineral specimens identified!